


Do you want to change the background of your headshot, or do you have a plain product photo that you want to turn into a lifestyle image?
No matter what the nature of your business is, knowing how to isolate specific elements from an image is a handy skill to have.
That’s why today, we’ve decided to teach you how to do just that.
In this post, we’re going to tackle how to remove background from your marketing photos.
So in this tutorial, we’re going to use 2 programs – Canva and Photoshop.
Let’s start with the easy one: Canva.
How To Remove Background Using Canva
If you have a Canva pro account, simply upload and select your image.
And then click on the background remover button, and wait for the magic to happen.

When we say magic, we’re not exaggerating. Canva’s AI for background removal is so accurate it can pick out the subject in the image and isolate it.
It completely removes the background effectively around 90-95% of the time, so it’s such an amazing tool.
Unfortunately, at least for now, Canva’s background removal tool isn’t foolproof.
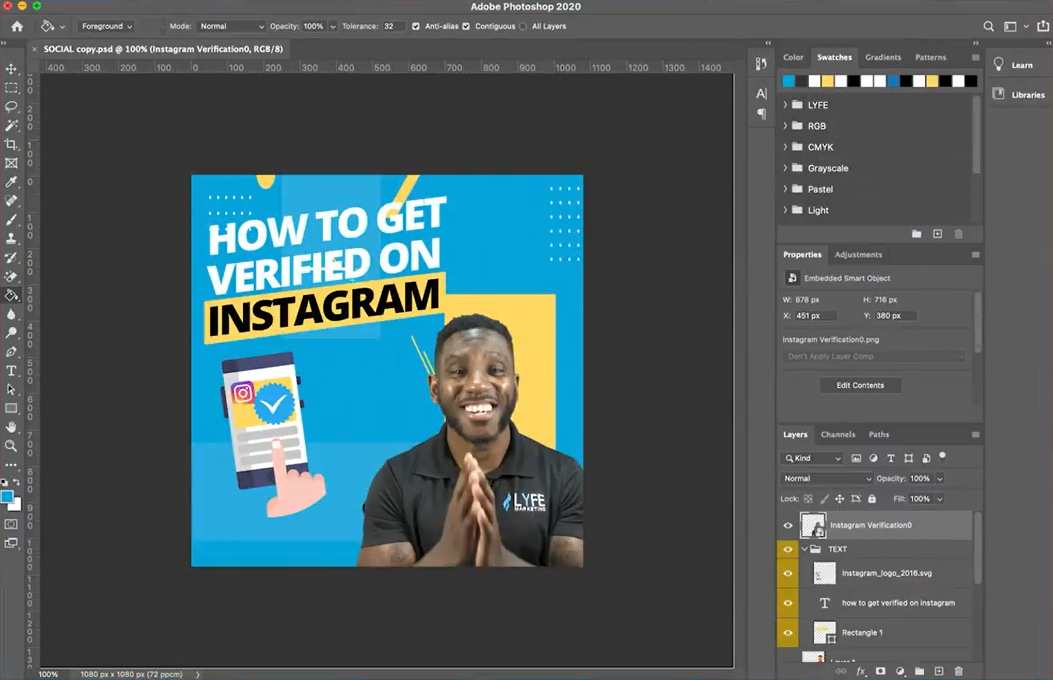
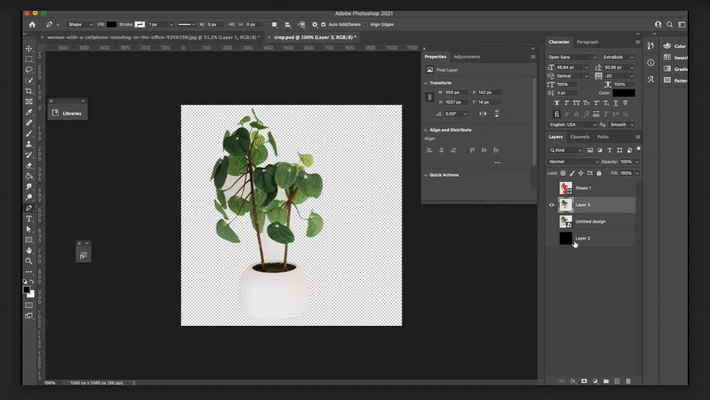
So in the event of special images like this…
…where the background just won’t cleanly come off of your subject image, we will go to Photoshop.
How To Remove Background Using Photoshop
1. Using Traditional Photoshop
Now traditionally, you can use the pen tool like this to create a selection that you can isolate from its background.
Select the pen tool or press P on your keyboard, which is the shortcut for the pen tool, and trace the object you want to be isolated from the background.

You start by clicking on any edge of your primary subject. By doing this, you create what’s called a node.
Now if you want to learn more graphic design terms, check out this post next.
Outline your subject by completing a closed shape using your nodes.
Point to point, you can either trace your subject with straight lines.
Or if you need to create a curve, just keep your mouse clicked when creating your next node.
And then, bend the line you just created by dragging your mouse until it takes the shape of the curve in the image.

Once you’ve completely traced over the outline of your subject, right-click on the shape you’ve just created on your canvas.
And then, select ‘CLICK SELECTION” and “OK”.
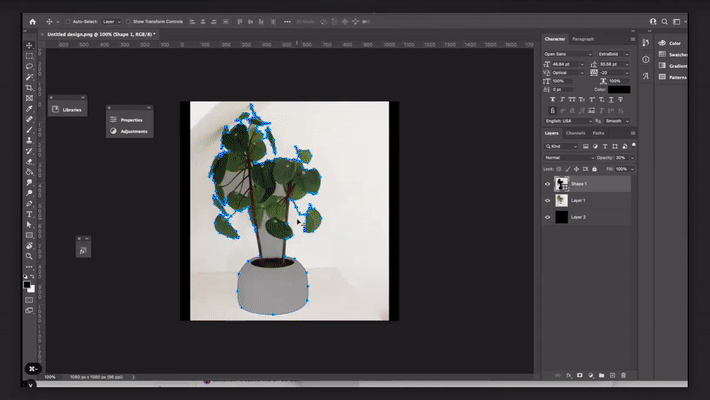
You now have a selection that outlines your subject.
Next, toggle the eye button (on the left side of the layers panel) on the layer where your shape is to hide it.
And then, select the layer where your subject image is in and hit “ctrl J” or “cmd J.”

This creates a new layer of the selected subject with its background removed.
Once you’ve finished tracing out your main shape, there are areas inside the selected area that still need to be manually traced and deleted as well.
Again, this is one of the more traditional methods of cleaning and cropping out an image background.
It’s great and it works, but it’s time-consuming.
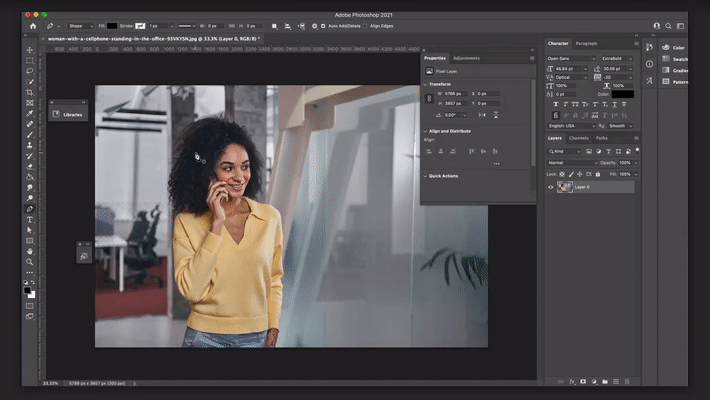
2. Using Photoshop Recent Version
However, if you happen to have a more recent version of Photoshop installed, either the 2020 or 2021 version on your computer…
…you can take advantage of their subject selection tool, which uses artificial intelligence to determine where your subject is and isolate it for you.
Open your image in Photoshop and make sure to unlock your image layer by clicking on the lock icon.

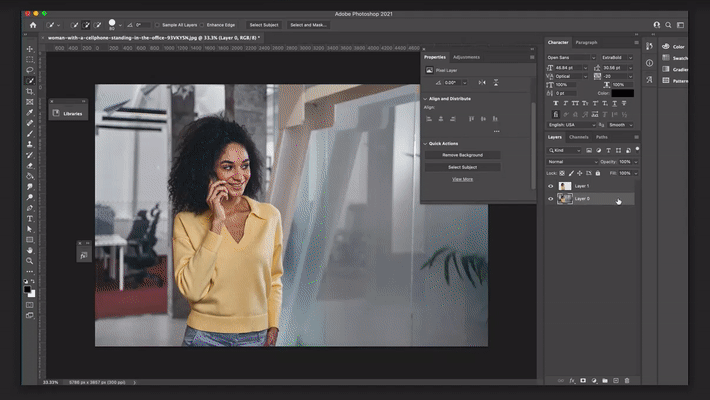
Next, select the quick selection tool on the tools panel on the left.
Now go to your properties window, and click to drop down “Quick Actions” where you’ll see 2 options. You can either:
- have Photoshop automatically remove your image’s background, or
- select your subject for you.
If you click on “Remove background”, only your subject will remain.

And if you click on “Select subject”, it will only create a selection so that your background remains intact.
You can then hit “ctrl J” or “cmd J” which creates a duplicate layer of your selection.

That way, you can add design elements, align them with your social media branding, or edit the original background without removing it.
And by the way, here are some more graphic design tips that you can read next.
Takeaways
Removing a pre-existing background from any subject image gives you the ability to stage it into any new setting you can think of.
Now that you know how to remove background, you can apply this to headshots, lifestyle images, product shots, seasonal images, and the like.
Speaking of product shots, here’s our post on how to make quality product shots that you can read next.
So that’s it for today’s guide!
Contact us now at 404-596-7925!
